Alerting is the cornerstone of any monitoring tool. When your website goes down, or when there’s a problem, you want to know about it before it affects your customers or business. In this blog post we’ll go through a basic setup of alerting so you can make sure you get the right notifications right on time.
User Settings
The first thing we’ll do (after you have set up a check that is), is to make sure that your User settings are fitted to your needs.
First you go to Alerting > Users in the menu to the left in your account. Here you can add new Users, see a list of your already existing ones and edit those, if needed.

Once you have set up a User, you will want to add Contact Methods. A contact method is pretty self-explanatory. Pingdom offer a number of ways that you can choose to be contacted by: Email, SMS, iOS and Android push notifications, amongst others.
You always need to have at least one Contact Method in your User settings, and the default one is the email that you signed up with, or was invited with as a User. This default contact method is referred to as a Primary contact method, and this one will always be sent out according to the alert delay in your alert policy (we’ll be getting to that).

You can change the primary contact method at any time. Any other Contact Methods that you add and want to use can be added as Fallbacks at intervals of your choosing.
Setting a Fallback to Immediately means that it will be sent out at the same time as the Primary contact method. You can however also set them to be sent after the initial alert, to the lowest delay of 1 minute, or the highest delay of an hour.
When you have added the contact methods you want to be alerted through, and added those as fallbacks, you can save the settings.
Alerting Endpoints
Before we go on to tell you what to do with this fine User setup you got going there, we’re going to go through Alerting Endpoints as well.
An alerting endpoint is like a User in the sense that they can be set up to receive alerts. However, there are some differences:
- A User needs to be invited to an account, an Alerting Endpoint does not.
- There is an account based limit on how many Users you can have in an account, there is no limit for Alerting Endpoints.
- A User has fallbacks, Alerting Endpoints only have contact methods.
- Alerting Endpoints can’t be added to schedules and they can’t log in to the account to manage incidents and other account related features – only a User can.
- Push notifications cannot be set up in the Alerting Endpoint.
Alerting Endpoints are very useful, though. Especially if you have a Starter account with only one User, but want to add a separate endpoint for alerting, instead of adding all contact methods into that one User. They also allow you to create specific alert rules for specific checks.
Which brings us to…
Alert Policies
An alert policy is the thing that ties the checks and your User settings together, and decides when and to whom to send alerts to.
To set up an Alert Policy, you go to Alerting > Alert Policies in the menu of your account and on this page you can either edit one of the 3 default Alert Policies that are already there, or create a new one. Let’s create a new one!
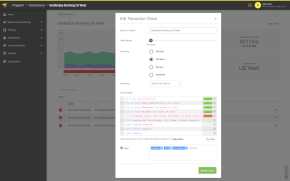
Click the button Add Alert Policy up in the right corner of the page.

You can start off by naming your new Alert Policy.
In the “Assign To” field you start by entering the name of the User which you want to assign the Incident to. When a check goes down, an incident is generated, and assigned to the User you choose. It is then up to this User to handle the incident, either by acknowledging it or closing it, whatever they feel necessary at the time.
If you want other Users (or Alerting Endpoints) to be aware of the outage at the same time as the Assigned User, you add them in the “Add More People (CC)” field.
After you have done this, you need to decide when they should be alerted. If you feel that your services are very critical, you can leave the “Delay” drop down as is (“None”) and the Alert Policy will send the alerts immediately after the check has gone down and the incident has been generated.
However, we normally recommend that for services that aren’t very critical you set the delay to at least a couple of minutes. That gives the system time to check your site again before sending you an alert, assuring you that it really is down and that there wasn’t just a temporary problem (ie Timeout) with your site.
Then you click Add Step.
When you do, a new empty step will appear for you to fill out. Here you can again add a User to assign the Incident to, and more people to CC. If you do add more than one step, you would generally set the delay to something other than “None”, as these additional steps would allow you to repeat alerting until you either acknowledge the problem or the site goes back up again and the incident is closed.
In theory you can have an infinite amount of steps in an alert policy, but we haven’t tried that theory yet!
The delay you set on the second step will be counted from the delay of the first step. So, if you have the first step set to alert you after 5 minutes, and the second step has a delay of 5 minutes, it will alert you after 10 minutes of the Incident being opened.
You have now successfully created an Alert Policy that you can connect to your checks!